If you think that one of the valves on your machine is faulty, it is pretty easy to carry out a few simple test to prove the status of the coil. Firstly with the machine disconnected from the power supply, simply remove the coil from the suspected valve. The coil is usually held on to the valve body with a nut and washer.
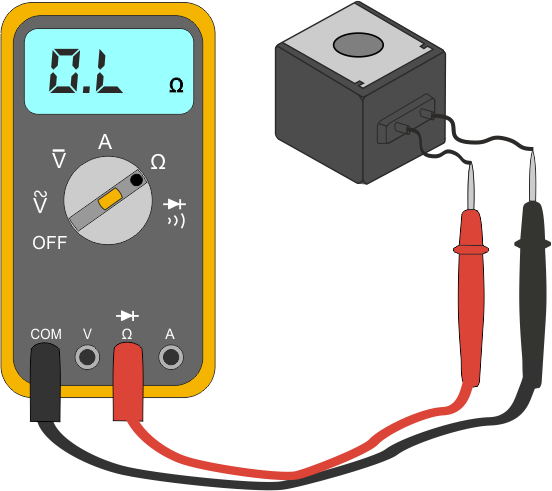
Once you have the coil removed, set your multi-meter to the 'Ohms' setting on the dial. Connect the red and black leads to the 2 wires of the coil. With the test leads connected, if you see a reading of '0.L' as shown in figure 1, then this suggest that the coil is 'open circuit' and needs replacing with a new one.
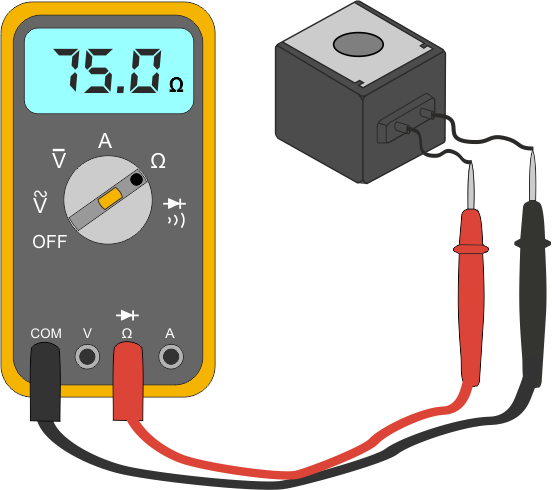
If you get a reading on the display of the meter as shown in figure 2, then the coil has tested as working. The reading value of your coil might be a little different due to the amount of windings on the coil design.
If there is a fault on the coil, then as solenoid valve bodies vary in design, it might be better at this point to just replace the entire valve and coil with a new one.